Double Gauze Whole Cloth Quilt Tutorial
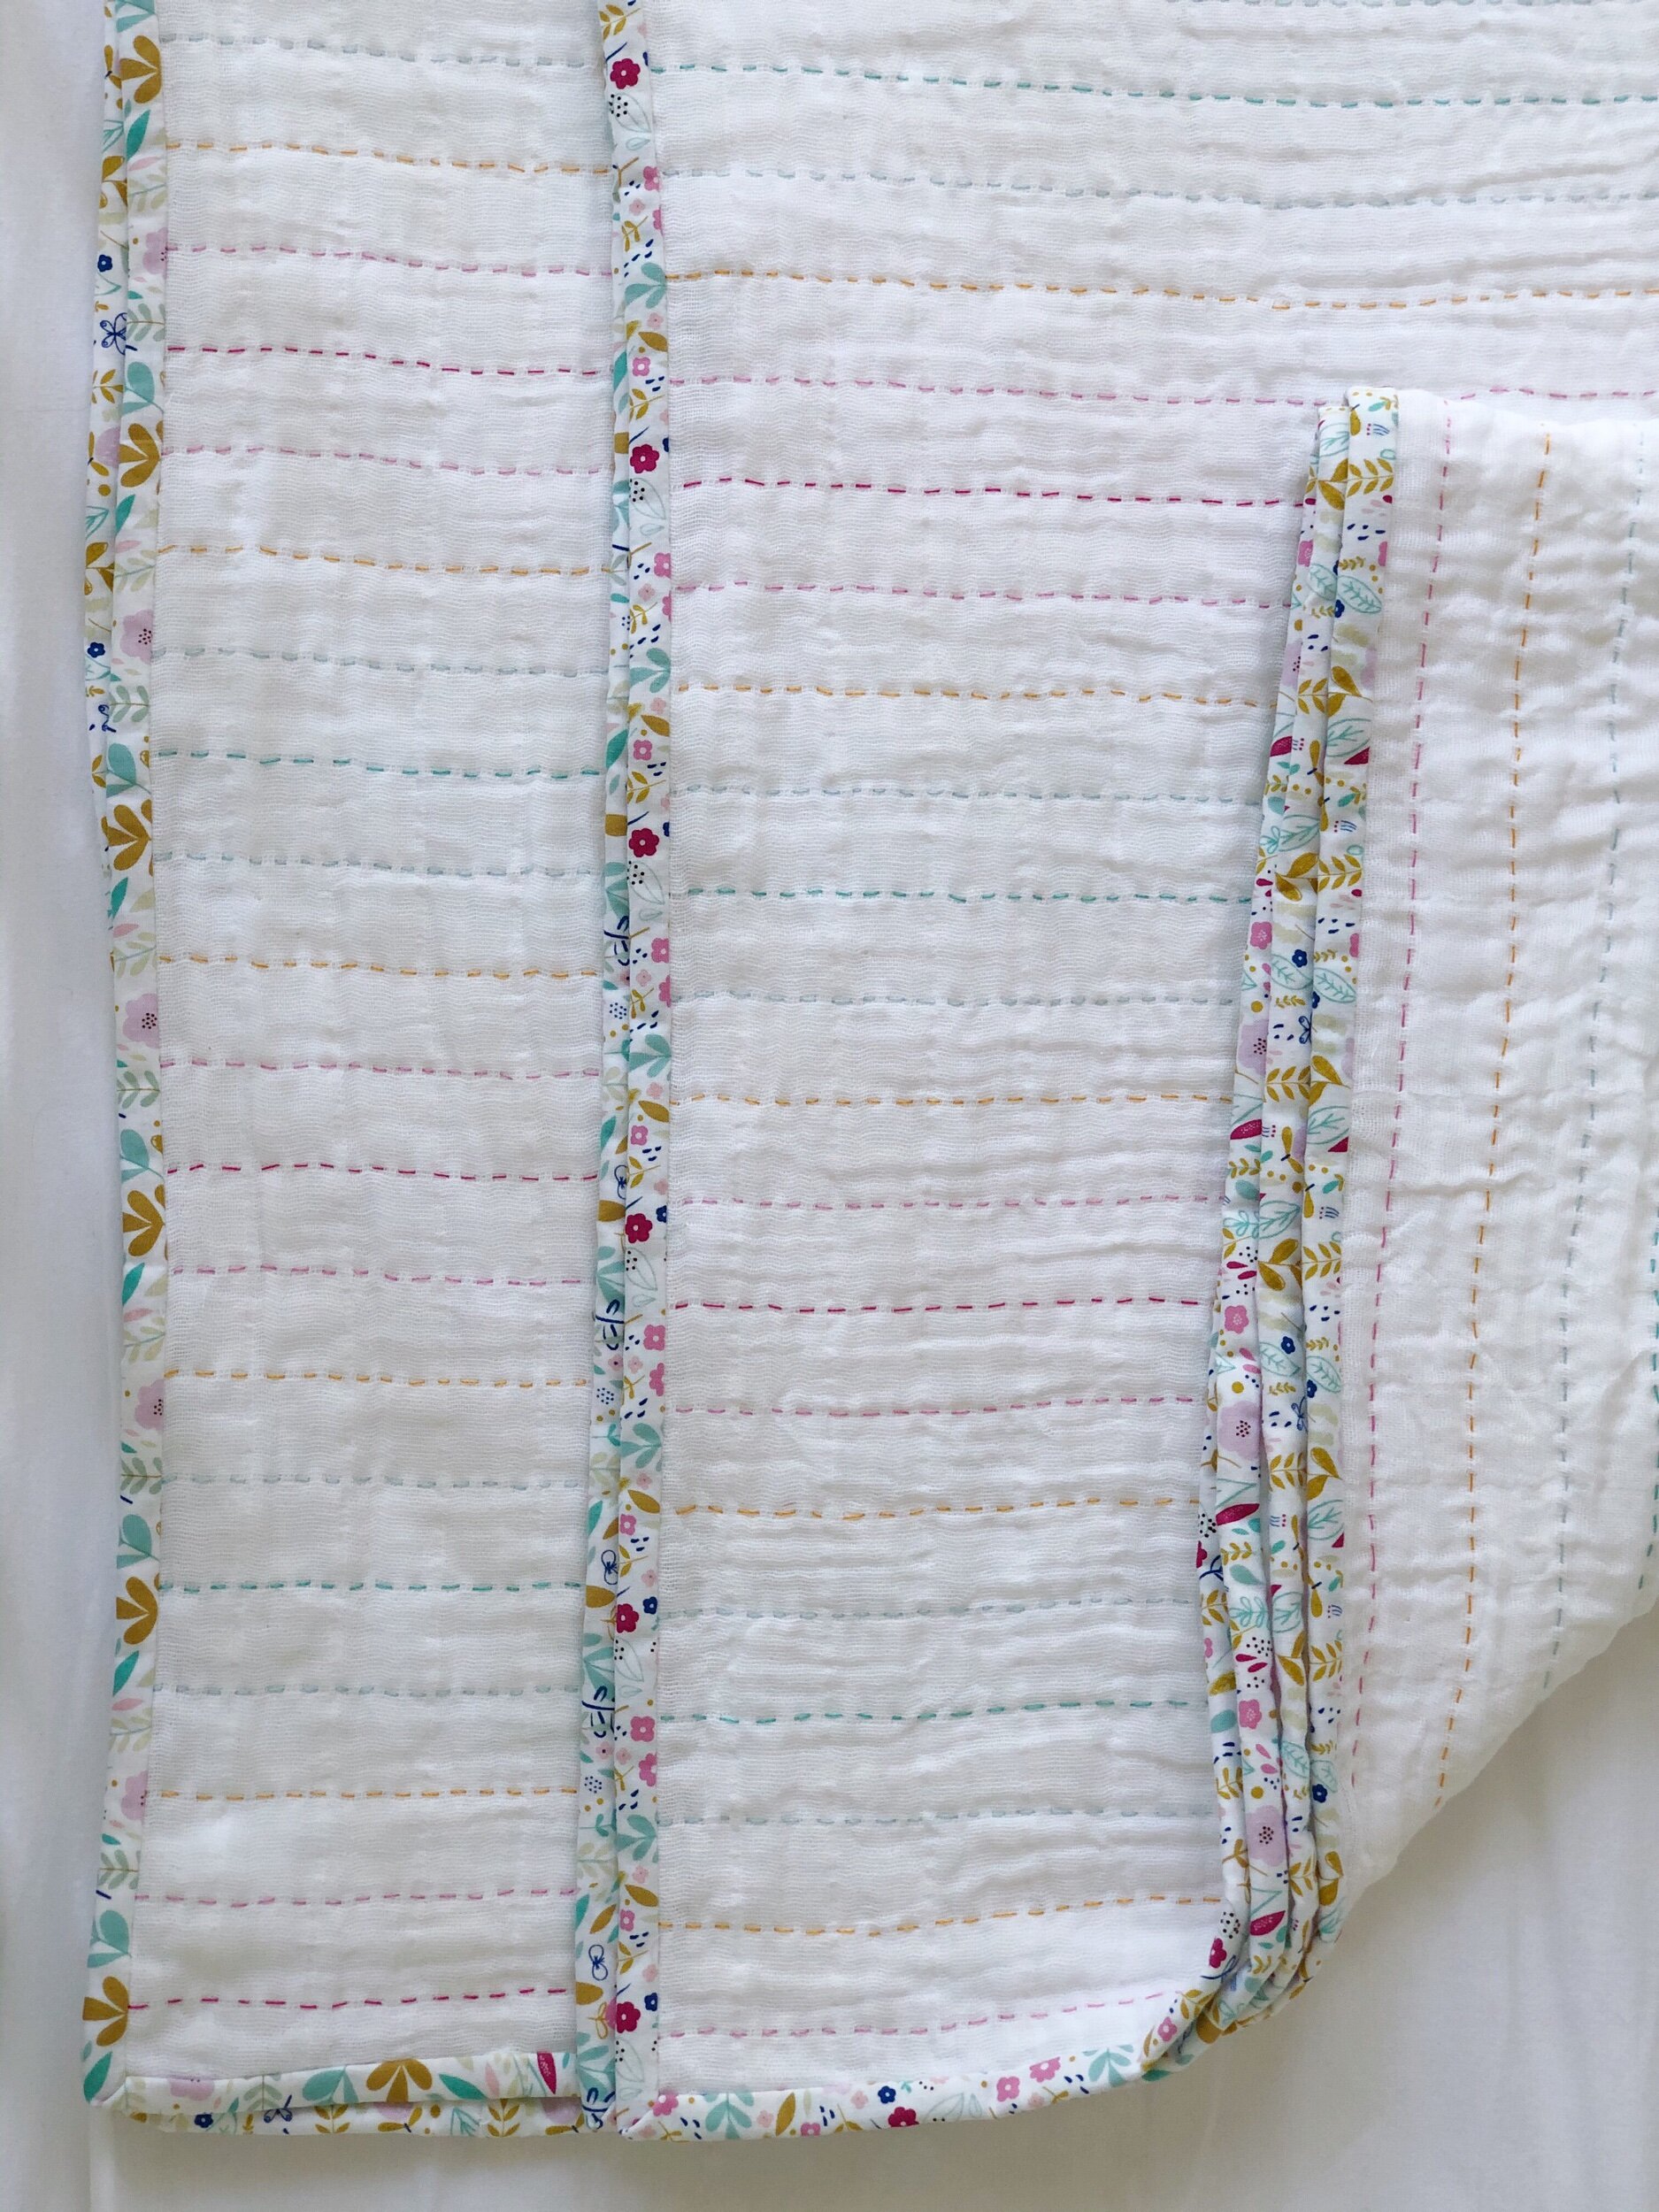
My newest favorite project - a simple, soft, lightweight quilt. Although this blanket is not technically a quilt because it does not contain a middle layer of batting, I’m calling it a quilt. Simple to make with 2 layers of double gauze fabric stitched together with either perle cotton or embroidery floss, or a combination of the 2. I stitched every 1” , following the grid lines that are on the fabric and let the binding fabric dictate the thread colors. The finished quilt is a generous 45” x 45” and can be machine washed and dried.
Hope you enjoy creating your own whole cloth quilt. Happy stitching!
Supplies:
2 ½ yards of double gauze 100% cotton fabric (do not wash before stitching)
½ yard 100% cotton fabric for binding
needles – embroidery or sashico or any needle with eye large enough for thread
DMC embroidery floss (about 10 skeins) or perle cotton – size 5, 8 or 12
Safety pins
Scissors
Optional: sewing machine to attach binding

Trim edges of double gauze evenly along grid line.

Fold cut edge to cut edge and match selvedge edges together.
Smooth out wrinkles and pin together, placing safety pins about every 10 inches.

Cut thread the width of fabric plus a little extra. The thread will be longer than I normally like to use but with this length, the beginning and ending knots will be in the selvedge and eventually hidden by the binding.
Knot end of thread. Begin in selvedge and stitch to other selvedge using a running stitch and following along the grid line to keep the stitching straight. When you reach the other side, make your end knot in the selvedge.


Continue stitching using the fabric grid lines to keep the stitching straight.
Enjoy the slow process of hand stitching!
Once you have completed all your hand stitching, it is time to bind the quilt.
Cut 5 strips 2½” x width of fabric. Trim off selvedge edges and sew the strips together end to end with ¼” seam to make one very long strip.
Fold wrong side to wrong side lengthwise and press.
Sew raw edges of binding to raw edge of quilt with a ¼” seam allowance, pivoting at the corners for mitered corners. Be sure to catch the knots on the selvedge edges in the seam allowance so they are hidden and secure. Trim edges to ¼”. Whip stitch folded edge of binding to the back.

And don’t forget to sign your quilt. I usually stitch my initials and the year into the binding.